Since we published our post about how to set up a basic CI environment for iOS projects using mainly Jenkins CI a lot of things have changed in the iOS testing and iOS developer universe. The community made serious amount of effort to make running automated building and testing a lot more straight forward.
The command line build process became much easier thanks again for the community (xctool and nomad-cli). Apple also rolled out its own CI solution – Xcode server which integrates with Xcode like no 3rd party tools before and makes running automated tests a cake walk (at least compared to the past). In our previous post we achived to run our unit tests, code analytics and Testflight beta builds in Jenkins CI. However, integration tests where actual app behavior can be tested was out of scope that time. In this post we are going to show the current setup of our iOS CI infrastructure and how you can start with automated iOS integration testing for your iOS projects.
Our setup for iOS integration testing
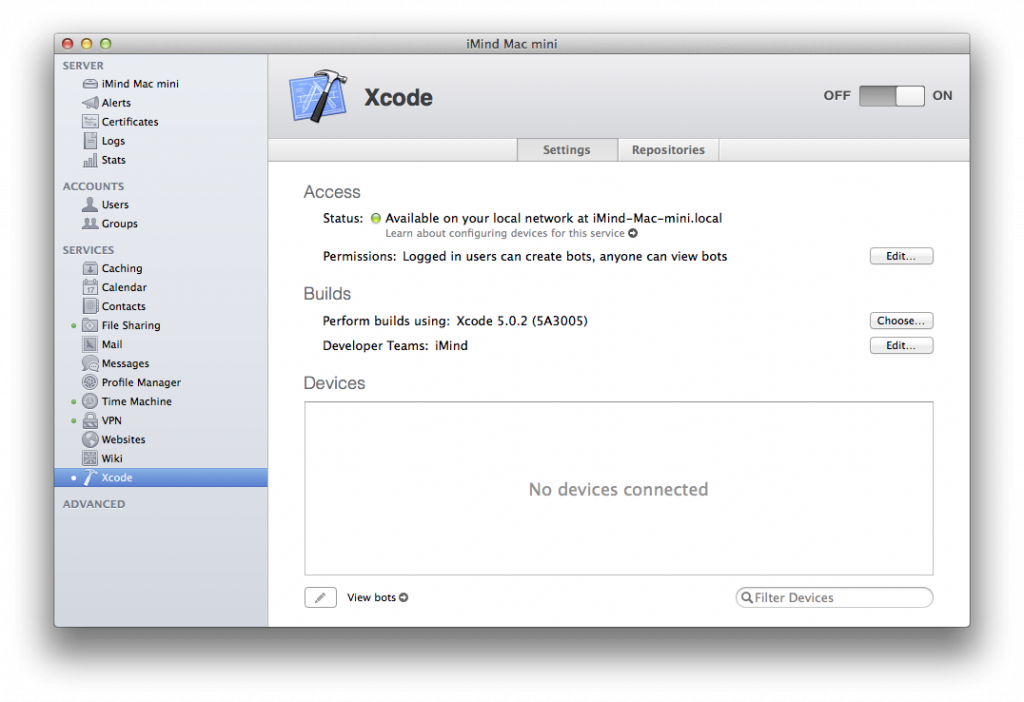
We use the same Mac Mini for iOS CI as in the previous article. Besides Jenkins now it also hosts an OS X Server instance (running the Xcode server which does the actual work) which is responsible for building and testing our projects in an easier manner. The Xcode server has to access the ios projects, so it is configured to access our repositories (which are also stored on a separate server) and have the projects pulled to the OS X Server regularly. Once there is a new commit the server tries to build the project and run its tests. The builds also can be started in local Xcode instances connected to the OS X Server.
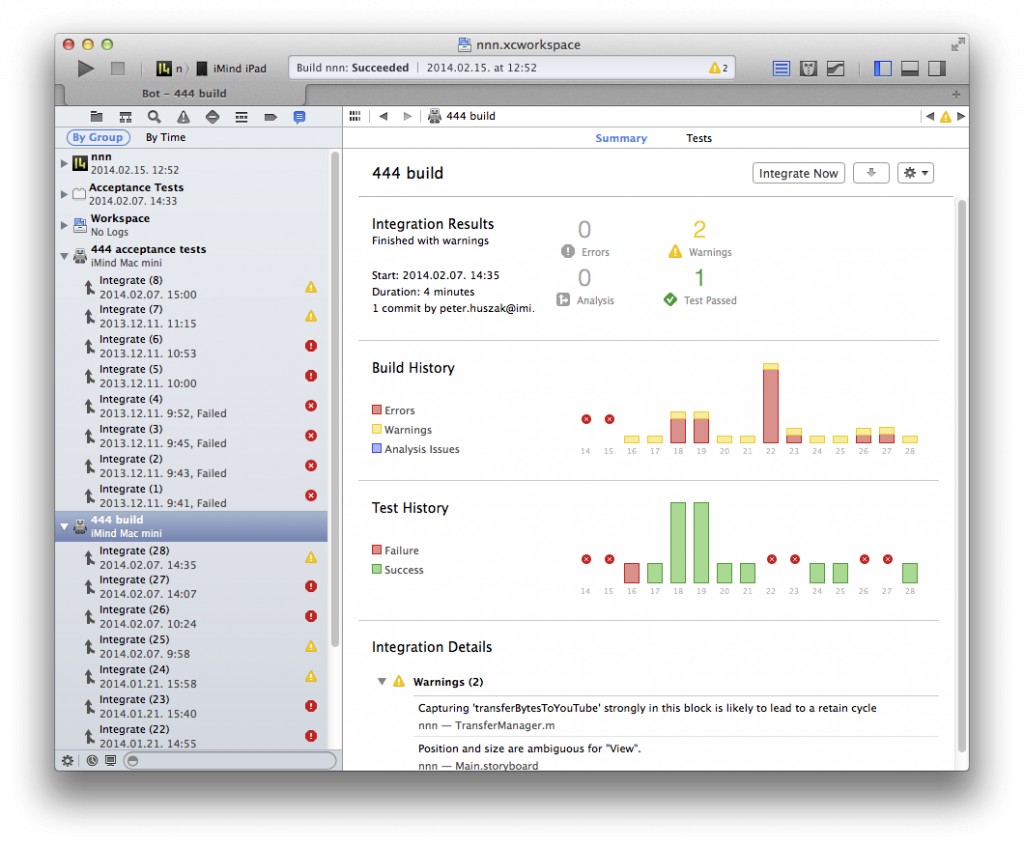
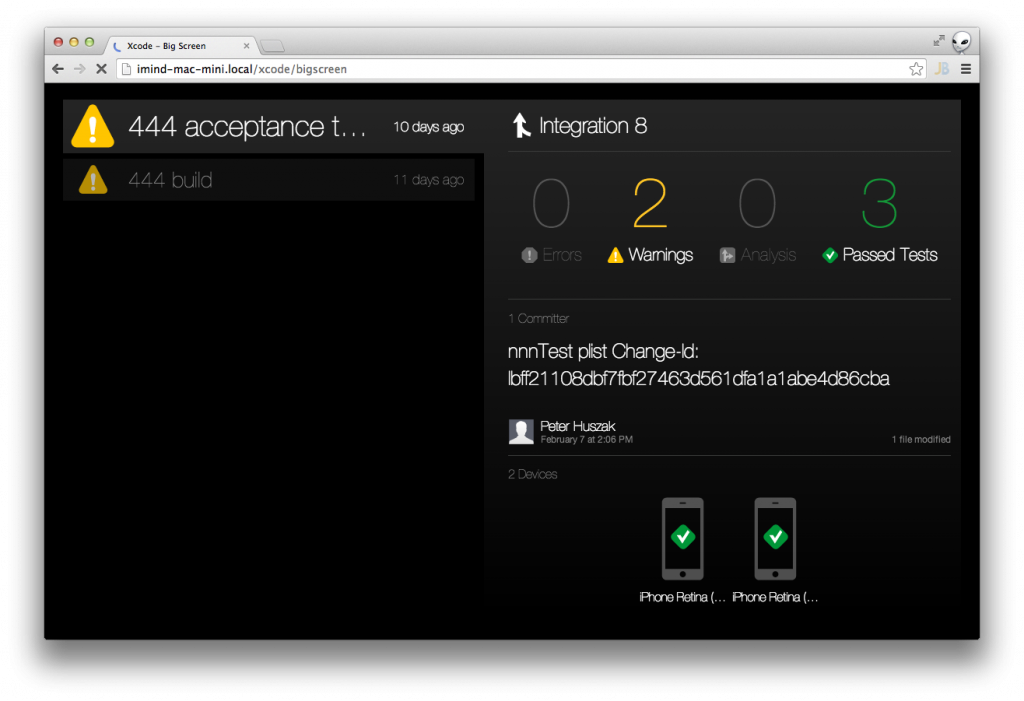
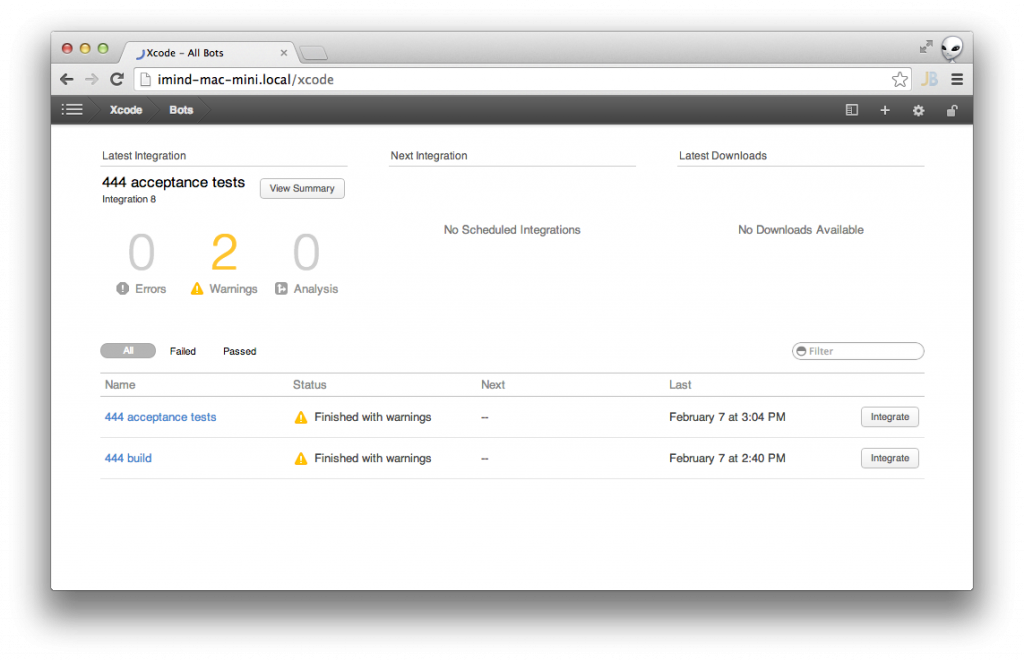
Build and test reports are also accessible through the Xcode server web interface. Here you can examine the same reports as in Xcode, and there is a special presentation about the overall state of your CI projects called Big screen.
Setting up a project for iOS integration testing
For testing purposes let’s create a basic iOS project. The project will be used for demonstrating acceptance and unit test automation, also can be used as a project template later. We use cocoapods for 3rd party lib package management. It makes integration of new libraries and frameworks way more easier as you will see when setting up KIF framework for iOS integration testing.
So if you haven’t done it yet, let’s setup Cocoapods:
$ sudo gem install cocoapods
If you stuck you can find a detailed walk-through here.
Now create a basic single view iPhone project and once it’s done, select your project in Xcode and click on “Add Target” in the bottom left corner of the editor. Select iOS -> Other -> Cocoa Touch Unit Testing Bundle. Call the target “acceptanceTests” and then delete the created acceptanceTests.m file. Close xcode and switch to a terminal:
$ cd ~/projects/testableApp
$ pod init
This sets up a basic podfile for your project which contains the dependency descriptors of your projects.
Insert these lines in the newly created podfile:
target 'acceptanceTests', :exclusive => true do
 pod 'KIF', '~> 2.0.0'
end
It tells cocoapods to set up your acceptanceTest target to include the KIF pod. Now the pod can be installed into the target:
$ pod install

Analyzing dependencies
Downloading dependencies
Installing KIF (2.0.0)
Generating Pods project
Integrating client project

[!] From now on use `testableApp.xcworkspace`.
This command does a bunch of things:
- creates a new workspace
- integrates your original project into the workspace
- creates the pod project in the workspace (which will contain all your dependencies eventually)
Now you can open your project in Xcode, but be sure to use the newly created workspace file!
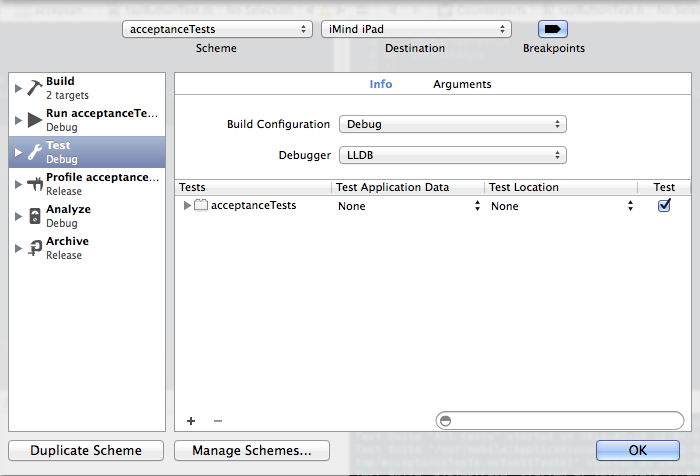
The last step is to set up your newly created acceptanceTests target and its scheme to run the acceptance tests for test action:
Select acceptanceTests scheme > Edit scheme… > Test tab > + > add acceptanceTests target.
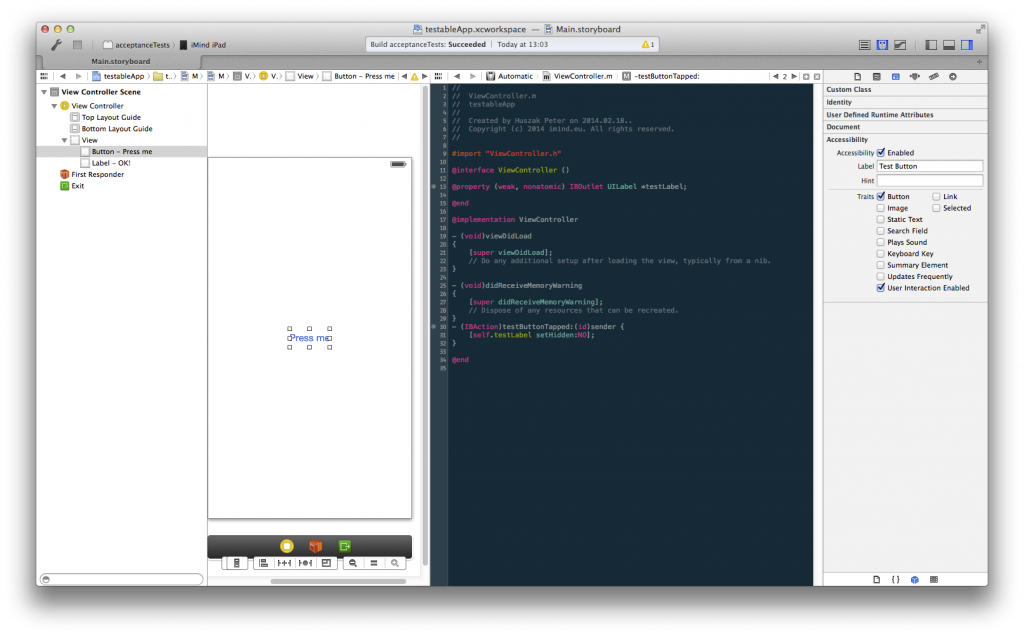
Now create a basic UI setup to test. Create a button and a hidden label, wire them up to its view controller, and most importantly set both of them an Accessibility Label:
- button: Test Button
- label: Button Pressed Label
Set up event handler for button action:
- (IBAction)testButtonTapped:(id)sender {
 [self.testLabel setHidden:NO];
}
Now you can start to work on test cases. Create tapButtonTest object in acceptanceTests dir:
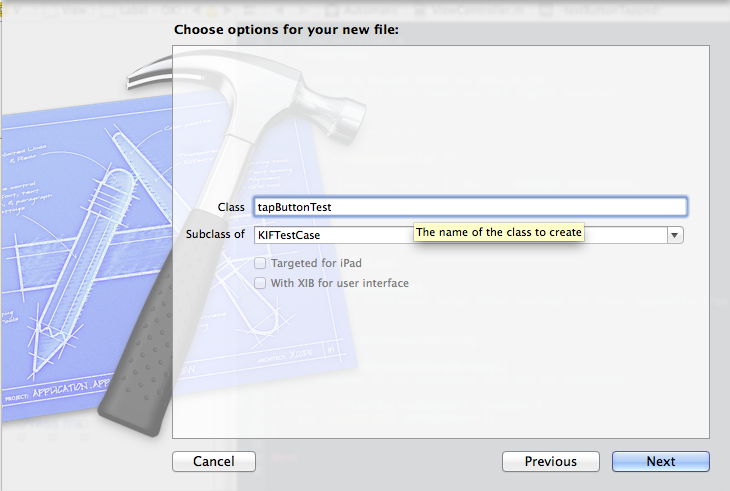
We want to make sure that the label appears when user taps the button.
tapButtonTest.h:
#import "KIFTestCase.h"
@interface tapButtonTest : KIFTestCase
@end
tapButtonTest.m:
#import "tapButtonTest.h"
#import "KIFUITestActor.h"

@implementation tapButtonTest

- (void)testLabelChanges {
 [tester tapViewWithAccessibilityLabel:@"Test Button"];
 [tester waitForViewWithAccessibilityLabel:@"Button Pressed Label"];
}
@end
Now if you run the Test action of acceptanceTest scheme you will see the following:
– simulator pops up with your app, and starts the automatic UI test.
– detailed log:
2014-02-18 13:04:05.684 testableApp[2365:60b] KIFTester loaded
Test Suite 'All tests' started at 2014-02-18 12:04:09 +0000
Test Suite '/var/mobile/Applications/70A036D5-84B2-4A61-83BF-52080CED51C6/tmp/acceptanceTests.octest(Tests)' started at 2014-02-18 12:04:09 +0000
Test Suite 'KIFTestCase' started at 2014-02-18 12:04:09 +0000
Test Suite 'KIFTestCase' finished at 2014-02-18 12:04:09 +0000.
Executed 0 tests, with 0 failures (0 unexpected) in 0.000 (0.000) seconds
Test Suite 'tapButtonTest' started at 2014-02-18 12:04:09 +0000
Test Case '-[tapButtonTest beforeAll]' started.
Test Case '-[tapButtonTest beforeAll]' passed (0.000 seconds).
Test Case '-[tapButtonTest testLabelChanges]' started.
Test Case '-[tapButtonTest testLabelChanges]' passed (0.515 seconds).
Test Case '-[tapButtonTest afterAll]' started.
Test Case '-[tapButtonTest afterAll]' passed (0.000 seconds).
Test Suite 'tapButtonTest' finished at 2014-02-18 12:04:10 +0000.
Executed 3 tests, with 0 failures (0 unexpected) in 0.515 (0.515) seconds
Test Suite '/var/mobile/Applications/70A036D5-84B2-4A61-83BF-52080CED51C6/tmp/acceptanceTests.octest(Tests)' finished at 2014-02-18 12:04:10 +0000.
Executed 3 tests, with 0 failures (0 unexpected) in 0.515 (0.516) seconds
Test Suite 'All tests' finished at 2014-02-18 12:04:10 +0000.
Executed 3 tests, with 0 failures (0 unexpected) in 0.515 (0.519) seconds
This pretty much sums up the basics of acceptance tests in iOS using KIF. You can find another detailed examples and documentation for KIF for further classes and methods.
Set up acceptance tests for CI
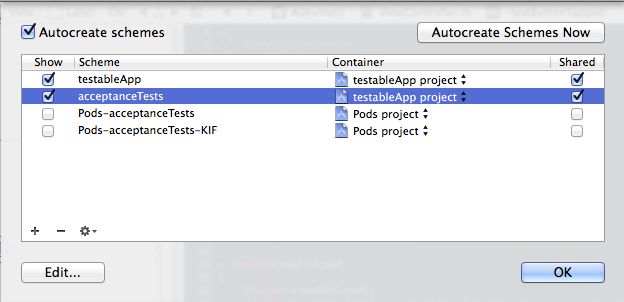
Basically we have everything to test our project in a CI environment. One thing you have to make sure if the acceptance test scheme is shared or not. If you want to use it with CI builds, it has to be a shared scheme:
CI server has to access your source code, preferably using a git repository.
Downloading and setting up Xcode server
If you are an iOS Developer Program member, you can redeem OS X Server from the following address:
https://developer.apple.com/devcenter/ios/index.action#downloads
You can download and install it to your server, and install it locally. The local instance will be used to manage the remote server only.
Make sure to enable Xcode server features after installing the OS X Server. Also make sure if the server uses the proper Xcode instance and using the same developer team as in your developer machine:
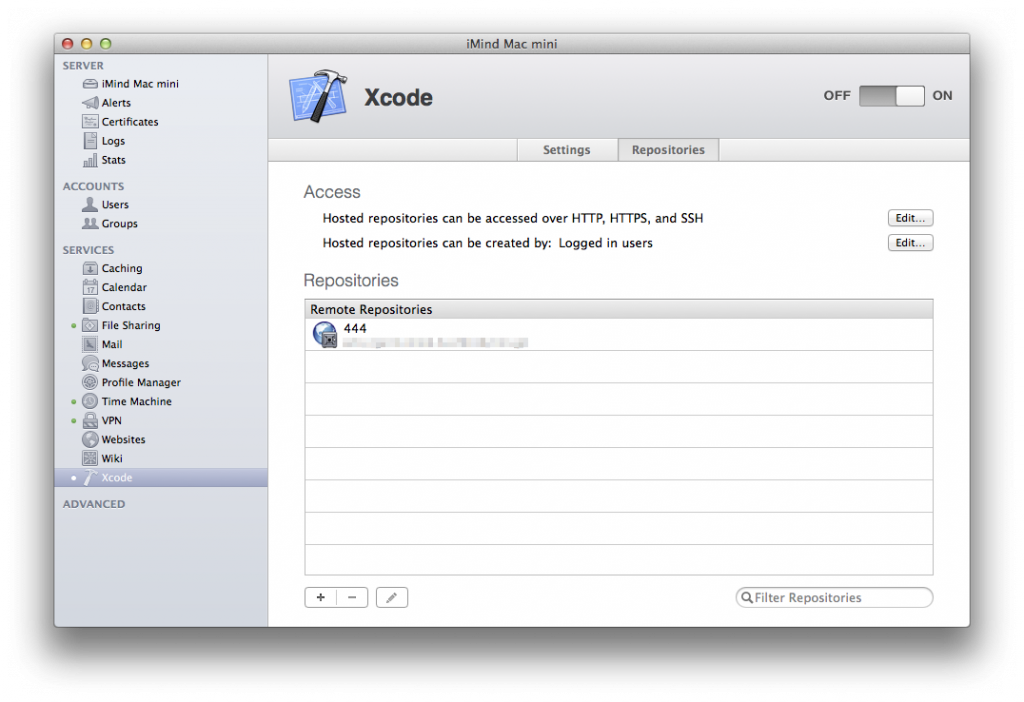
It’s time to set up access to your git or svn repository. You cannot add repositories when creating or editing bots (jobs), so the most convenient way is to set up all of your repositories which you want to use for CI now.
Setting up a bot for building and testing the project
The last step is to create the actual jobs which build the project and run the tests. The most detailed settings are accessible through the web interface of Xcode server. You can access it by clicking on View bots link in OS X Server > Xcode tab bottom bar.
Once you have access, log in with your desktop credentials into the Xcode web interface to have access to bot creation-edition features. Click on + (top right) to create a new bot:
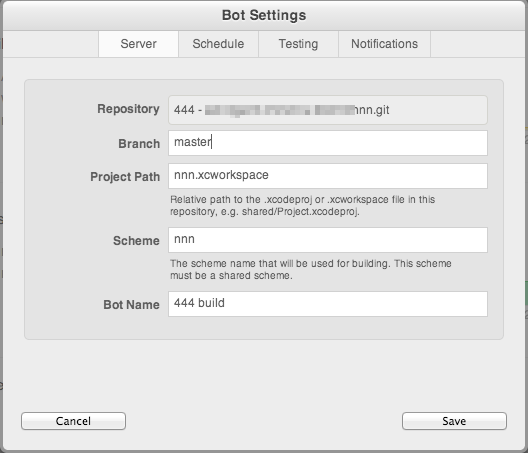
Here you can set every aspect of the build job. Let’s go tab-by-tab:
Server
Set the basic settings of the bot. You have to select the repository, the workspace file and the name of the scheme to build. You can give a name for the bot.
Schedule
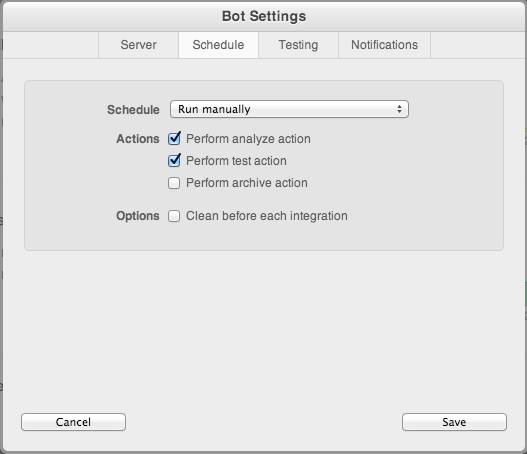
In schedule tab you can set when to start the bot. You can start it manually, or on a schedule. You can have the bot to poll your repository and build it whenever there are changes. There’s an option to set a custom trigger script to start the build too.
Testing
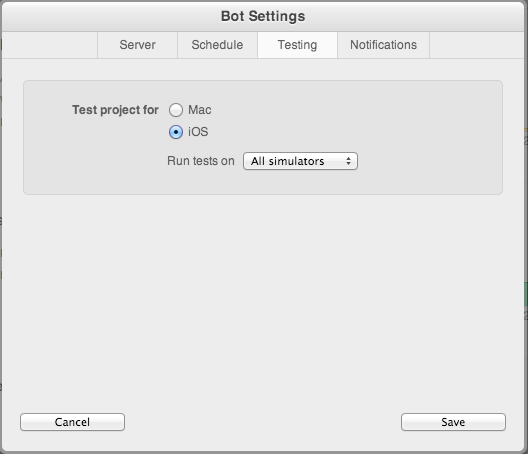
At this point you can fine tune your testing environment. You can select which simulators you want to use for testing. If you connected a testing device to your test server you can select those devices here as well for testing.
Notification
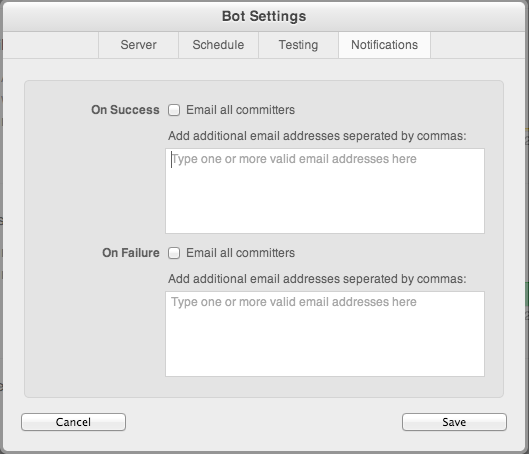
Last but not least you can trigger notifications if the build was successful or failed.
Running custom tasks after build
With Jenkins the build process is somehow more separated from the actual Jenkins job. You can define custom script build steps, run plugins, etc. With Xcode server the bot can only work with the scheme you set. Therefore if you want to run additional tasks after xcode server built your project you need to define a custom scheme for that. There is a nice tutorial about setting up your bot to publish your archive to Testflight by Matt Vlasach, make sure you check it out.
Questions, comments?
Contact us at hello@iMind.eu or me personally on peter.huszak@iMind.eu. You can also follow us for updates on twitter, or facebook. Have a nice build :)

